Blog #30 DIY Photography

Blog #30 DIY Photography
Two significant photography events happened this weekend that seem coincidental.
However, I don’t believe in coincidences. I prefer to call them significant events. The law of determinism states that events occur because of other events. In other words, everything happens for a reason. The topic of this week’s blog is film photography. Indeed, film is not dead . In fact there has been some evidence to the contrary. There may very well be a resurgence in film photography.
The first of the two significant events is that I read this great article in Artsy by Molly Gottschalk about the resurgence of film that contained the interesting metric about a third of the film shooters these days were between 20-30 years old. If this is true, then it is refreshing to know that the newer generation of artists, professionals, and hobbyist photographers are embracing film.
Second, I started to develop film at home. I bought a few materials and chemicals and developed my first 35mm black and white roll a few days before writing this blog entry. That’s right, DIY (Do-It-Yourself) all the way. It’s amazing how simple, and time saving it can really be. The next step is that scanning at home should be a breeze. I purchased an Epson V600 for the job. It’s a pretty basic scanner and should do the job just fine. I love the idea of multi-tasking. When the film is drying (that takes about an hour), I can doing other things like work or read at home. The scanning can also take an hour or less but when you’re at home, the images can go right into Lightroom for post processing and sorting. Developing at home should actually save a little bit of money in the long run especially if you calculate time and travel to the photo store.
My last work flow routine is something that I will still need to do for colour film. That is, drive or take the MTR (train) to the photo place in TST (almost an hour), wait 1-1.5 hours for the processing of 1-2 rolls of film. Drive or train it back home, then load the CD into the computer and download the images into Lightroom. I estimate that I will save at least an hour on every developing activity. That’s really worth it if you ask me. There are tons of resources and applications online for everything that you need to develop and scan your own film. Colour, however, is more complicated and easier to screw up so for the time being, I’m sticking to black and white. I actually prefer it most of the time, anyway. It’s a real zen experience to shoot, develop, and scan (or print in the darkroom). It’s really about enjoying the process of making images. It’s the thrill of the chase, not the kill, sort of thing.
I will still need to access the darkroom at work (International School) for making contact sheets or prints but I don’t need to do that to regularly.
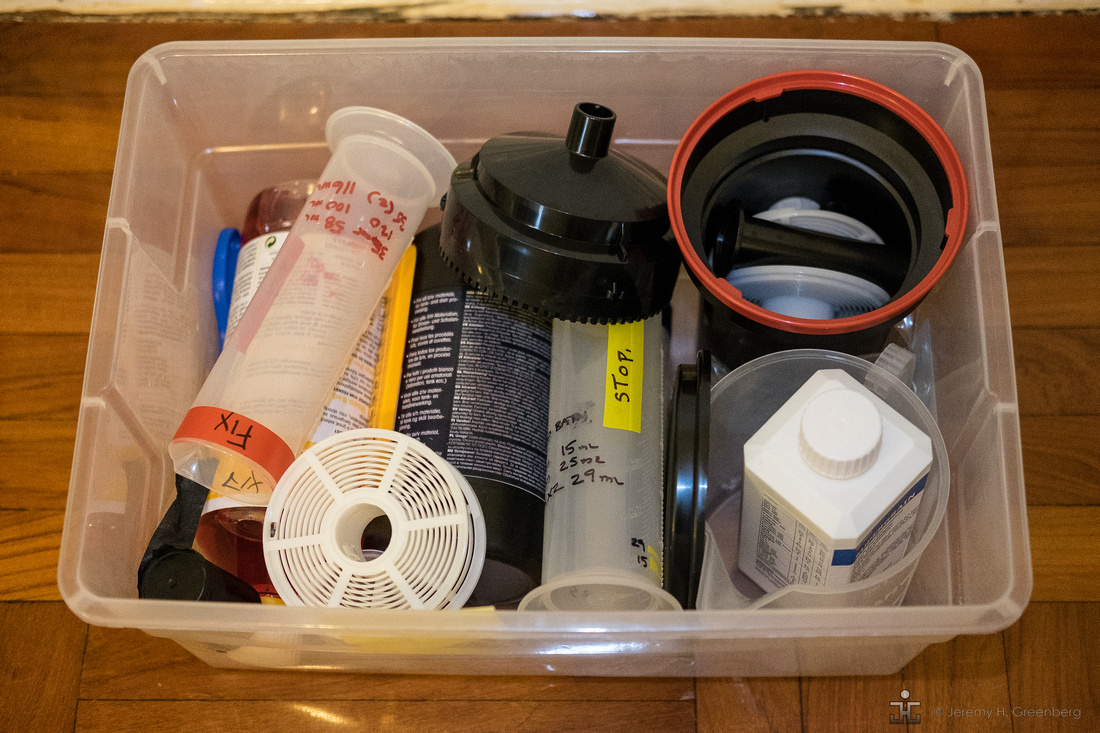
The materials needed are really simple. You need running water and a sink as well as a place to hang dry the film. Some fishing line and a few clips will do just fine. Any bathroom, regardless how small should work. In terms of chemicals and hardware, the minimum requirements are as follows:
- Developer (Duh!)
- Stop Bath (Essential to stop the development process)
- Fixer (critical step that removed the silver oxide fairy dust from the emulsion)
- Developing Tank (usually comes with 1-2 film reels)
- Changing bag (lightproof for removing the film from the cassette and loading it onto the reel)
- 1-2 film loading reels for 35mm and/or 120mm (medium format film)
- A few different sized plastic measuring beakers for measure the dilutions of chemicals to water (i.e. 50ml, 260ml, 500ml)
- Scissors (for cutting the leader and end go the film and cutting the film into strips for storage or scanning
- Plastic negative film holders (acid free and archival quality is the way to go)
- Thermometer suitable for water (most films get developed at 20 degrees celsius)
- Timer or application on a smartphone that will alarm at the appropriate time intervals to guide you through the process
That’s it! All of this stuff actually takes up a surprisingly small space to store. The box that I am using to store this stuff is about the size of a boot box or two shoe boxes. A scanner is not small but its certainly not prohibitive and can be packed and stored when not being used. The chemicals and hardware cost a total of around $ 200 USD and should last many years. The amount of chemicals should be suitable to develop 50-60 rolls of film. The scanner is about $200 USD but should last many years as well. All in it’s around $400 USD give to take depending what you buy but this is pretty much the basics. Most of the materials are re-usable except for the consumable chemicals of course. Don't drink them! consumables are not all for drinking.
So, are you ready to become a DIY-guy? (or gal). It’s quite liberating to be self-sufficient at anything really, not to mention fun. If you’re a film shooter and get regular enjoyment out of shooting film then doing the DIY-thing is a worthwhile investment.
Good luck!
The light is always right.
jhg